Combining Keycloak, LDAP, and Nextcloud (With Discord SSO!)
For most of the past couple months my energies at Eyebeam have been focused on helping move Undersco.re to a more scalable user management and authentication model. Previously, we'd just been using Keycloak with a Discord identity provider. This provided a relatively seamless single sign-on experience, but had a number of drawbacks, most importantly:
- Running through the Discord IDP, without being able to synchronize with guilds, meant all users had to be a member of Underscore's Discord to use SSO.
- This process didn't allow for real one-to-one account syncing across different apps, particularly NextCloud, which serves as the core of Underscore. Instead, it would create separate user accounts in apps like NextCloud, which used Keycloak + Discord for authentication but wouldn't reflect changes in Keycloak's user management.
- This also created a pretty strong dependency on Discord, which we want to avoid in order to allow potential integrations with other identity providers.
To remedy these problems, after a fair bit of poking around, we ultimately settled on using LLDAP as our single source of truth for users and user groups, effectively making Keycloak a middleware solution for managing authentication, sessioning, and SSO. Long-term, we hope to be able to combine something like Discord role synchronization with LLDAP, so that individual organizations can use Discord for user management (as described in this GitHub issue). Right now, though, our userbase and number of organizations is small enough that manually updating our LLDAP database isn't a huge lift.
This process involved a huge amount of trial and error, and I am by no means a system administrator or DevOps specialist, but we do have a working version of this model. I'll do my best to explain what I think is happening at each step, but I welcome any feedback on improving this process or points where I might be misunderstanding what's happening.
LLDAP
Our process mostly follows the Docker setup instructions on LLDAP's Github. You can use the following docker-compose.yml to run it locally, making sure to mkdir data and chown 1000:1000 data in the same directory you're running docker-compose up:
version: '3'
volumes:
lldap_data:
driver: local
services:
lldap:
image: nitnelave/lldap:stable
# Change this to the user:group you want.
user: "1000:1000"
ports:
# For LDAP
- "3890:3890"
# For the web front-end
- "17170:17170"
volumes:
# "lldap_data:/data"
# Alternatively, you can mount a local folder
- "./:/data"
environment:
- LLDAP_JWT_SECRET=REPLACE_WITH_RANDOM
- LLDAP_LDAP_USER_PASS=REPLACE_WITH_PASSWORD
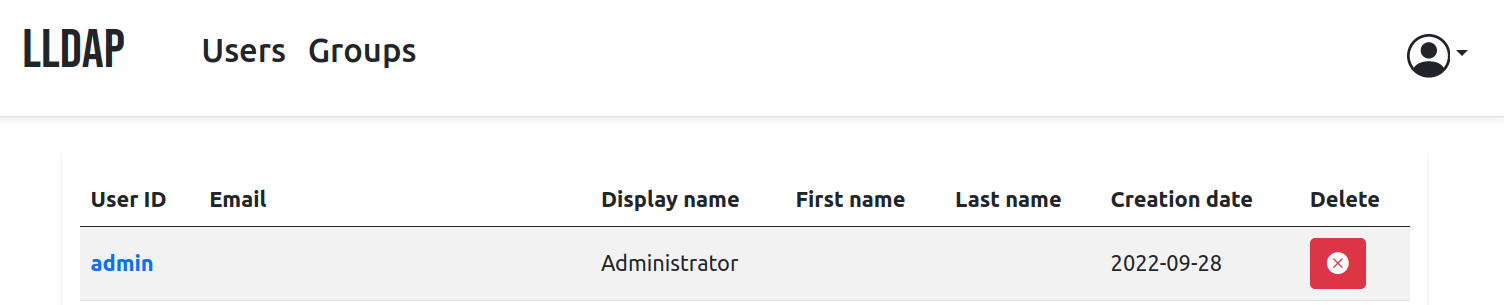
- LLDAP_LDAP_BASE_DN=dc=example,dc=comIf all goes well, you should be able to log in to lldap at localhost:17170 and create some users and groups:
Discord
You'll need to create a Discord developer account and create an OAuth2 application.
Keycloak
Start a keycloak docker container, making sure to include the keycloak-discord IDP .jar file in the providers folder. You can use the following `docker-compose.yml` file, making sure to mkdir keycloak_data/providers/ and include the .jar file in the providers folder:
  keycloak:
    image: quay.io/keycloak/keycloak:legacy
    container_name: keycloak
    ports:
      - "8081:8081"
    environment:
      - DB_VENDOR=POSTGRES
      - DB_ADDR=postgresql
      - DB_DATABASE=${KEYCLOAK_DATABASE_NAME}
      - DB_USER=${KEYCLOAK_DATABASE_USER}
      - DB_SCHEMA=public
      - DB_PASSWORD=${KEYCLOAK_DATABASE_PASSWORD}
      - KEYCLOAK_USER=${KEYCLOAK_ADMIN_USER}
      - KEYCLOAK_PASSWORD=${KEYCLOAK_ADMIN_PASSWORD}
      - KEYCLOAK_ADMIN=${KEYCLOAK_ADMIN_USER}
      - KEYCLOAK_ADMIN_PASSWORD=${KEYCLOAK_ADMIN_PASSWORD}
      - PROXY_ADDRESS_FORWARDING=true
      - KC_HOSTNAME=localhost
      - PUID=1000
      - PGID=998
    volumes:
      - './keycloak_data/providers:/opt/jboss/keycloak/providers'
    depends_on:
      - postgresql
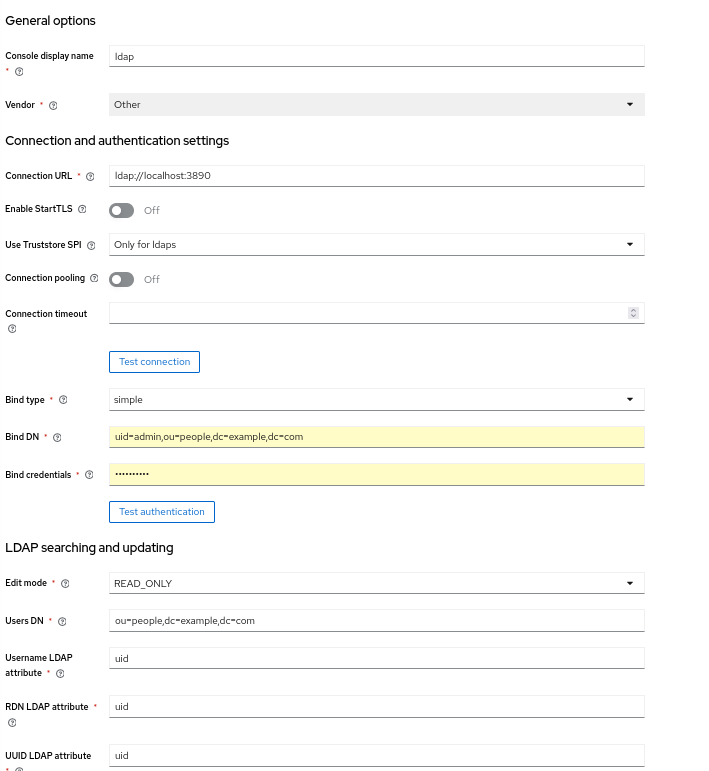
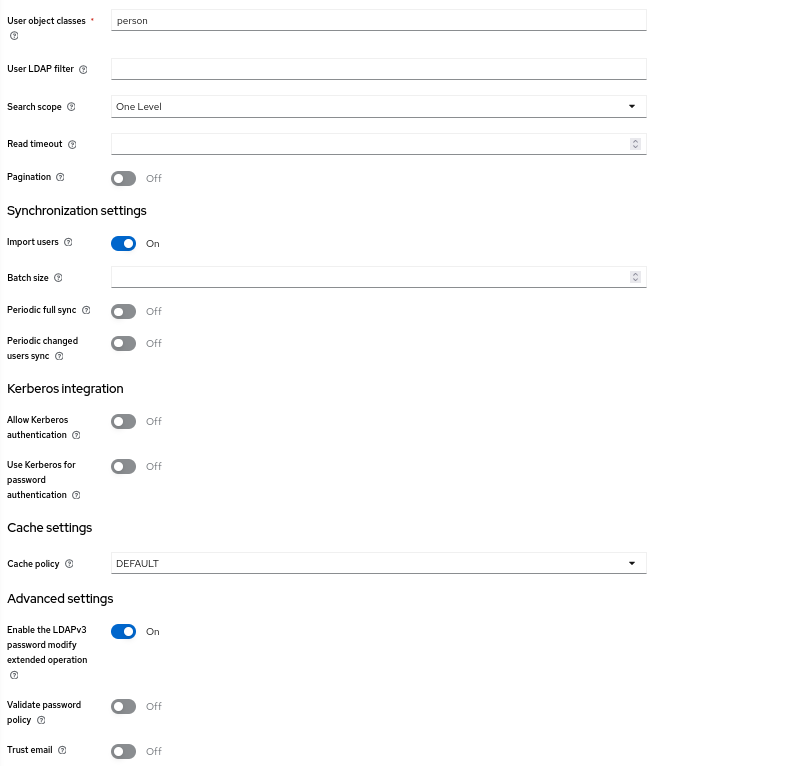
In the User Federation section, follow the instructions for setting up LLDAP with keycloak. To run with your local LDAP, it should look like this:
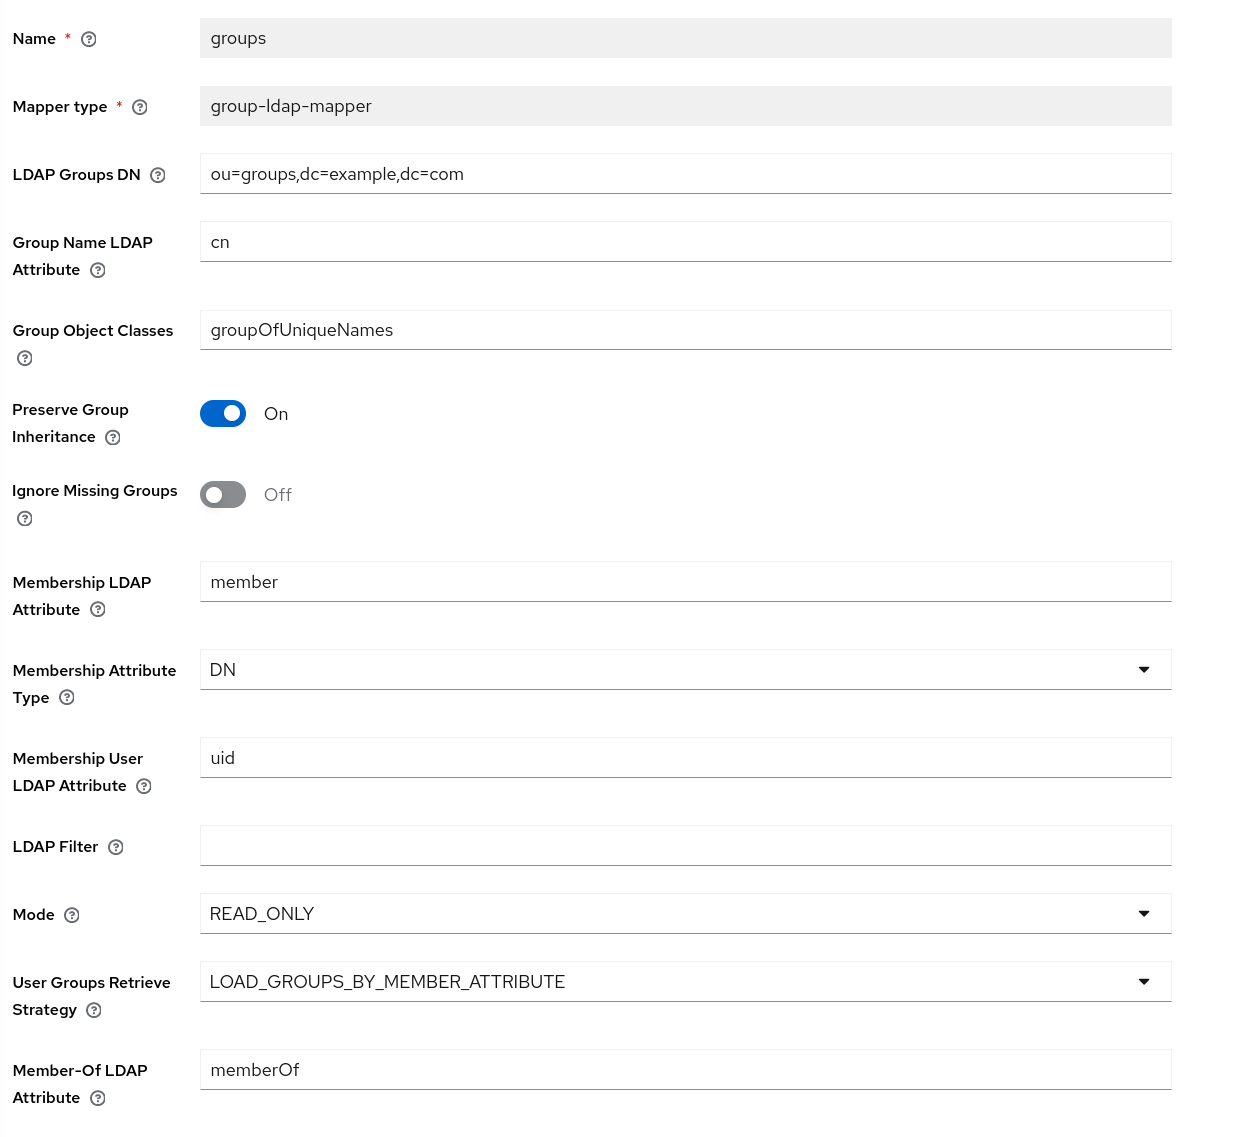
To sync groups, you'll also need to add the groups mapper: your settings should look like this:
You can now set up a Discord IDP: hit Identity providers > Discord, and include the Client ID & Client Secret from the Discord app page:
NextCloud
Finally, let's set up our NextCloud! We're using the LinuxServer docker-compose as a base:
---
version: "2.1"
services:
  nextcloud:
    image: lscr.io/linuxserver/nextcloud:latest
    container_name: nextcloud
    environment:
      - PUID=1000
      - PGID=1000
      - TZ=Europe/London
    volumes:
      - /home/{YOUR_USER}/nextcloud:/config
    ports:
      - 80:80
      - 443:443
    extra_hosts:
      - "host.docker.internal:host-gateway"
    restart: unless-stopped
Once your nextcloud container is up and running, we'll want to make sure it can talk to the LLDAP container to pull data. You can get your container names by running docker container ls:

Mine are nextcloud and lldap_lldap_1.
Now create a network for docker to connect them:
docker network create lldap-bridge
And connect both containers:
docker network connect lldap-bridge nextcloud
docker network connect lldap-bridge lldap_lldap_1
Now they should be able to address each other by their container names.
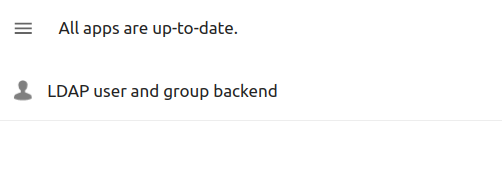
In Nextcloud, search for "LDAP user and group backend" and enable it:
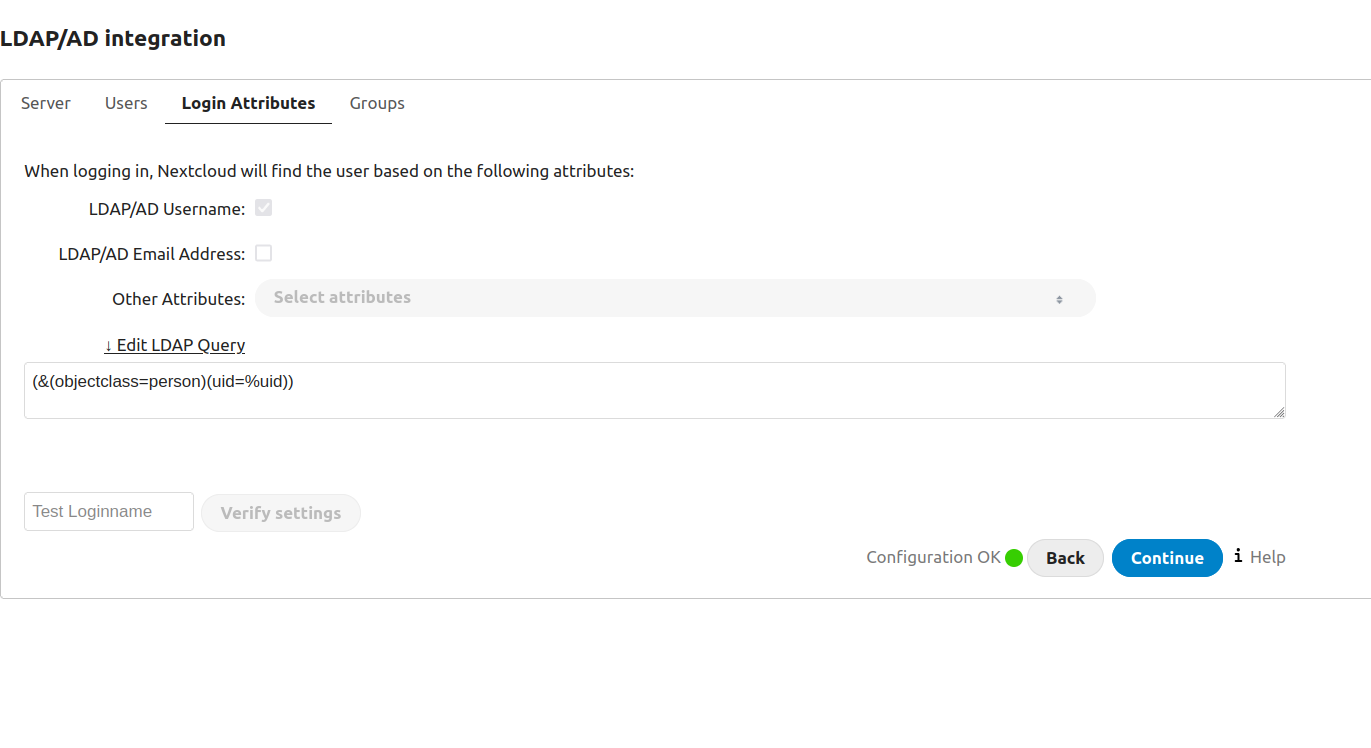
Then go to Settings > LDAP/AD integration, and follow the instructions from LLDAP. Your settings should look like this - note that we're using the LLDAP container's name so we can address it directly through our bridge network.
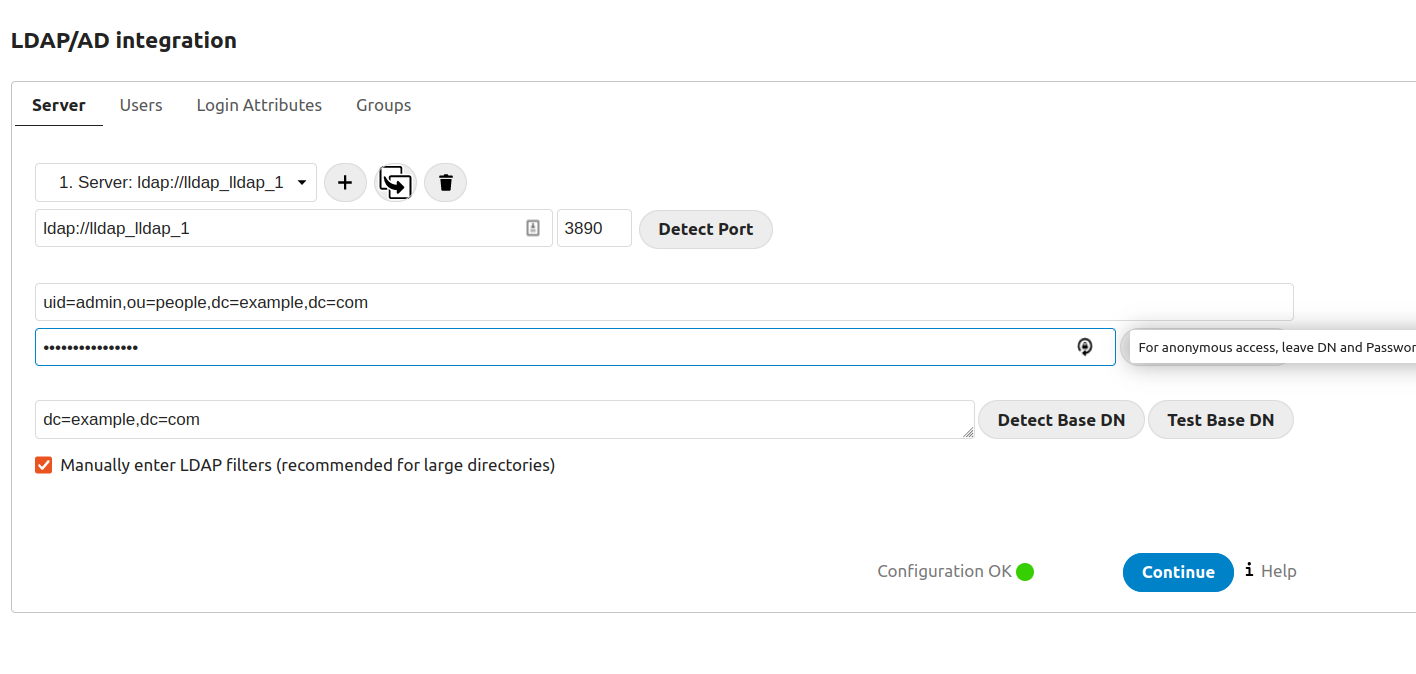

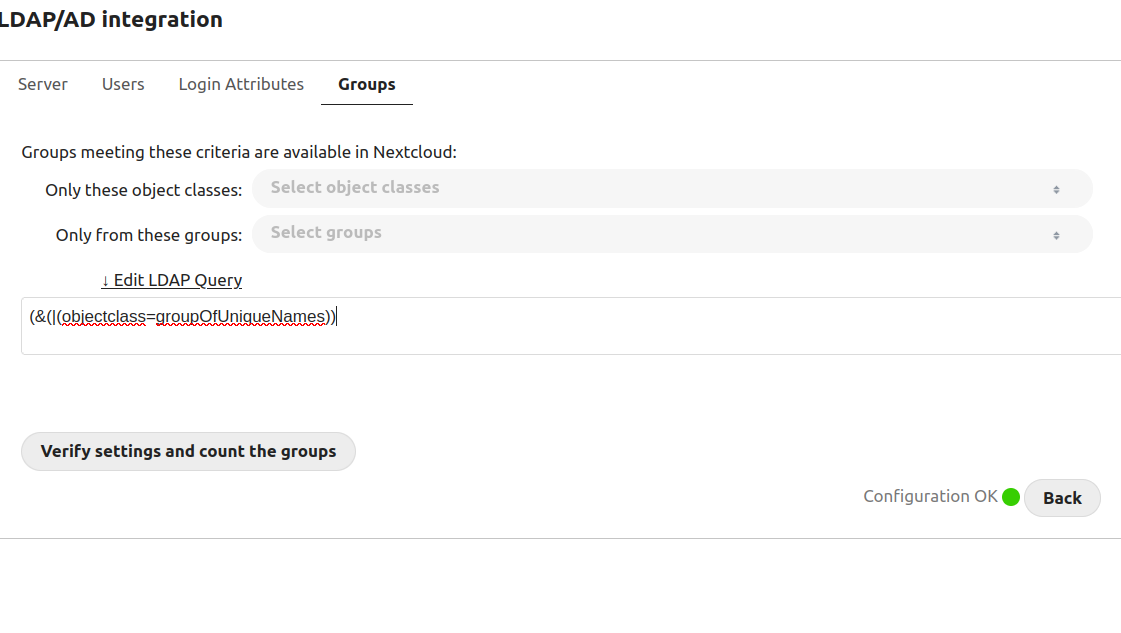
(In the groups section, be sure to add any groups you want to sync in "Only from these groups").
If you verify your settings and get "configuration OK", then go to "Users" in Nextcloud, you should see all your users from LLDAP!

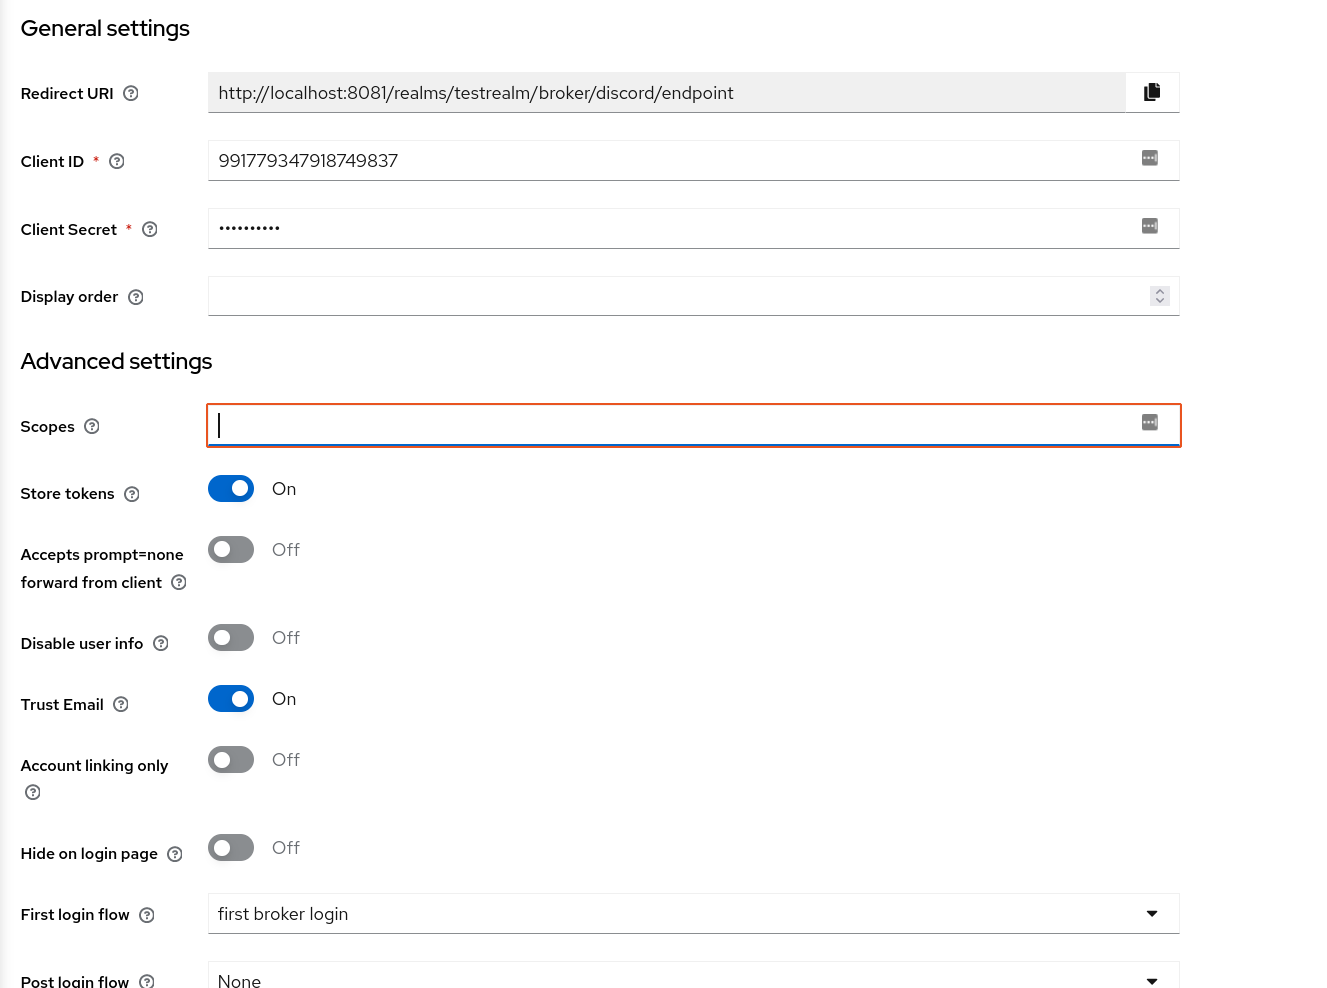
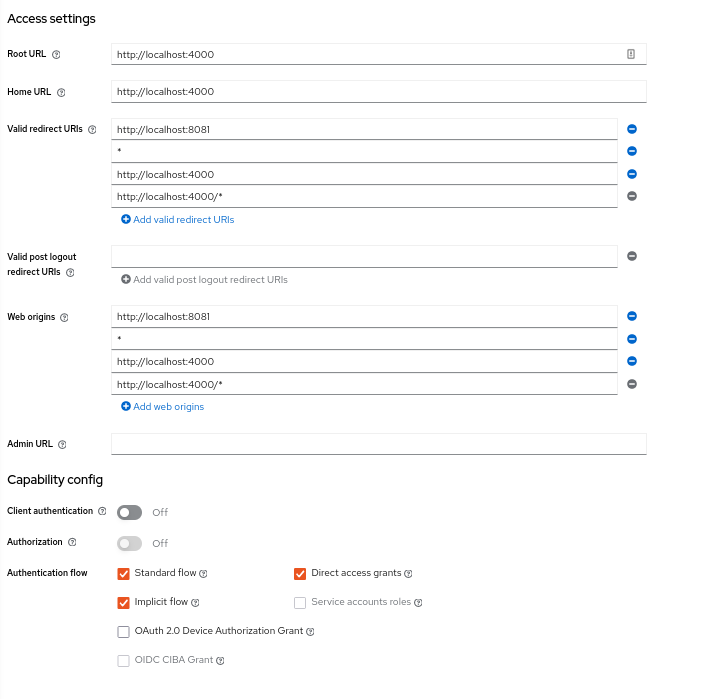
Now, let's set up NextCloud as a client in KeyCloak for authentication with Discord. In the Keycloak admin console, go to Clients and hit Create client. Your settings should look something like this:
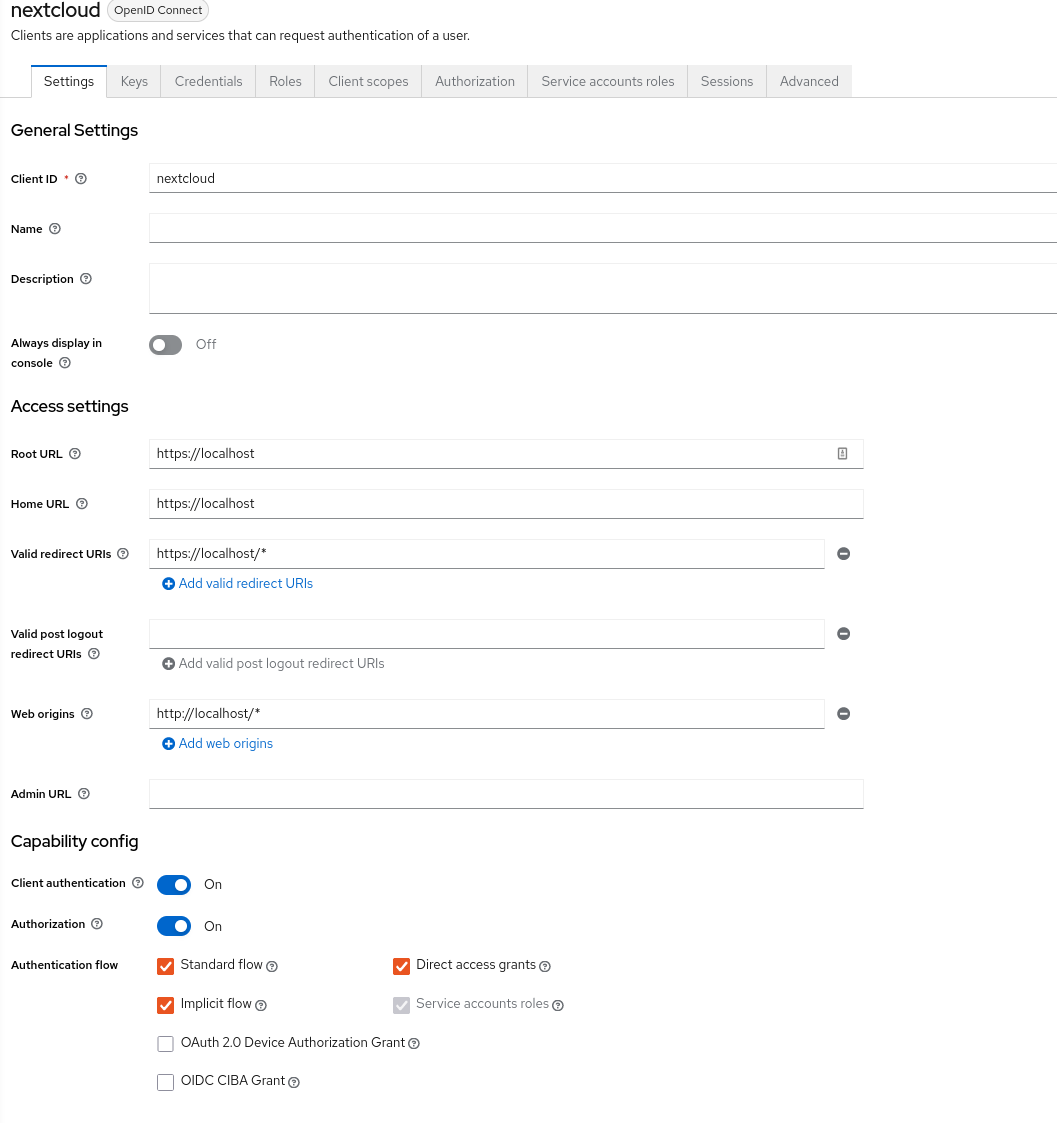
content/images/2022/10/image-2.png
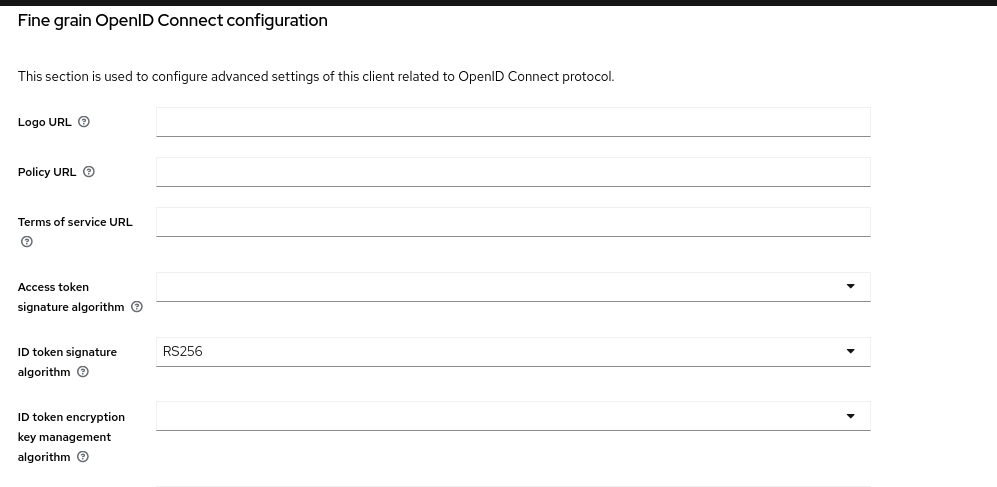
Go to "Advanced" settings for the client and make sure to use RS256 for your ID token signature algorithm and Use refresh tokens


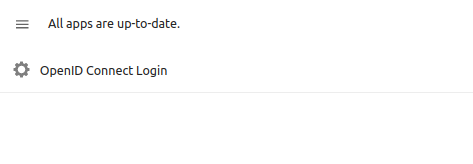
Now, finally, let's enable OIDC. Go back to Nextcloud, go to Apps, and search for OpenID Connect Login, then enable it.
Now, in the volume mounted by your NextCloud docker container (if you're following this tutorial exactly, it should be /home/{YOUR_USER}/nextcloud), go to www/nextcloud/config/ and add the following to config.php. DO NOT make these changes in the root-level config.php - OpenID connect will not register them, and will likely throw a "Curl error 3" when you try to log in. Make sure to enter your client secret from Keycloak, and note that we use host.docker.internal to connect to Keycloak's endpoints.
    // Some Nextcloud options that might make sense here
    'allow_user_to_change_display_name' => false,
    'lost_password_link' => 'disabled',

    // URL of provider. All other URLs are auto-discovered from .well-known
    'oidc_login_provider_url' => 'http://host.docker.internal:8081/realms/testrealm',

    // Client ID and secret registered with the provider
    'oidc_login_client_id' => 'nextcloud',
    'oidc_login_client_secret' => '{YOUR_SECRET}',

    // Automatically redirect the login page to the provider
    'oidc_login_auto_redirect' => true,

    // Redirect to this page after logging out the user
    'oidc_login_logout_url' => 'http://localhost:8081/realms/testrealm/protocol/openid-connect/logout',

    // If set to true the user will be redirected to the
    // logout endpoint of the OIDC provider after logout
    // in Nextcloud. After successfull logout the OIDC
    // provider will redirect back to 'oidc_login_logout_url' (MUST be set).
    'oidc_login_end_session_redirect' => true,

    // Quota to assign if no quota is specified in the OIDC response (bytes)
    //
    // NOTE: If you want to allow NextCloud to manage quotas, omit this option. Do not set it to
    // zero or -1 or ''.
    'oidc_login_default_quota' => '1000000000',

    // Login button text
    'oidc_login_button_text' => 'Log in with OpenID',

    // Hide the NextCloud password change form.
    'oidc_login_hide_password_form' => false,

    // Use ID Token instead of UserInfo
    'oidc_login_use_id_token' => false,

    'oidc_login_attributes' => array (
        'id' => 'preferred_username',
        'mail' => 'email',
        'ldap_uid' => 'preferred_username',
    ),

    // Default group to add users to (optional, defaults to nothing)
    'oidc_login_default_group' => 'oidc',

    // Use external storage instead of a symlink to the home directory
    // Requires the files_external app to be enabled
    'oidc_login_use_external_storage' => false,

    // Set OpenID Connect scope
    'oidc_login_scope' => 'openid profile',

    // Run in LDAP proxy mode
    // In this mode, instead of creating users of its own, OIDC login
    // will get the existing user from an LDAP database and only
    // perform authentication with OIDC. All user data will be derived
    // from the LDAP database instead of the OIDC user response
    //
    // The `id` attribute in `oidc_login_attributes` must return the
    // "Internal Username" (see expert settings in LDAP integration)
    'oidc_login_proxy_ldap' => true,

    // Disable creation of new users from OIDC login
    'oidc_login_disable_registration' => true,

    // Fallback to direct login if login from OIDC fails
    // Note that no error message will be displayed if enabled
    'oidc_login_redir_fallback' => false,

    // Use an alternative login page
    // This page will be php-included instead of a redirect if specified
    // In the example below, the PHP file `login.php` in `assets`
    // in nextcloud base directory will be included
    // Note: the PHP variable $OIDC_LOGIN_URL is available for redirect URI
    // Note: you may want to try setting `oidc_login_logout_url` to your
    // base URL if you face issues regarding re-login after logout
    'oidc_login_alt_login_page' => 'assets/login.php',

    // For development, you may disable TLS verification. Default value is `true`
    // which should be kept in production
    'oidc_login_tls_verify' => false,

    // If you get your groups from the oidc_login_attributes, you might want
    // to create them if they are not already existing, Default is `false`.
    'oidc_create_groups' => false,

    // Enable use of WebDAV via OIDC bearer token.
    'oidc_login_webdav_enabled' => false,

    // Enable authentication with user/password for DAV clients that do not
    // support token authentication (e.g. DAVx⁵)
    'oidc_login_password_authentication' => false,

    // The time in seconds used to cache public keys from provider.
    // The default value is 1 day.
    'oidc_login_public_key_caching_time' => 86400,

    // The minimum time in seconds to wait between requests to the jwks_uri endpoint.
    // Avoids that the provider will be DoSed when someone requests with unknown kids.
    // The default is 10 seconds.
    'oidc_login_min_time_between_jwks_requests' => 10,

    // The time in seconds used to cache the OIDC well-known configuration from the provider.
    // The default value is 1 day.
    'oidc_login_well_known_caching_time' => 0,

    // If true, nextcloud will download user avatars on login.
    // This may lead to security issues as the server does not control
    // which URLs will be requested. Use with care.
    'oidc_login_update_avatar' => false,
Refresh localhost, and if everything went according to plan, it should take you directly to the Keycloak login screen!
This SSO method can also be used with other applications - for example, we use Dashy for our "login" page, and the session is shared across different apps connected to Keycloak, so people are able to go directly from Dashy to NextCloud.
Bonus: Dashy Homepage
We follow the basic docker-compose.yml setup from Dashy's docs, creating a config folder with a dashy-config.yml file for customization in the same folder we're running Dashy in.
docker-compose.yml
---
# Welcome to Dashy! To get started, run `docker compose up -d`
# You can configure your container here, by modifying this file
version: "3.8"
services:
  dashy:
    container_name: Dashy

    # Pull latest image from DockerHub
    image: lissy93/dashy

    # To build from source, replace 'image: lissy93/dashy' with 'build: .'
    # build: .

    # Or, to use a Dockerfile for your archtecture, uncomment the following
    # context: .
    # dockerfile: ./docker/Dockerfile-arm32v7

    # You can also use an image with a different tag, or pull from a different registry, e.g:
    # image: ghcr.io/lissy93/dashy or image: lissy93/dashy:arm64v8

    # Pass in your config file below, by specifying the path on your host machine
    volumes:
      - ./config/dashy-config.yml:/app/public/conf.yml
      # - /path/to/item-icons:/app/public/item-icons

    # Set port that web service will be served on. Keep container port as 80
    ports:
      - 4000:80

    # Set any environmental variables
    environment:
      - NODE_ENV=production
    # Specify your user ID and group ID. You can find this by running `id -u` and `id -g`
    #  - UID=1000
    #  - GID=1000

    # Specify restart policy
    restart: unless-stopped

    # Configure healthchecks
    healthcheck:
      test: ['CMD', 'node', '/app/services/healthcheck']
      interval: 1m30s
      timeout: 10s
      retries: 3
      start_period: 40s
config/dashy-config.yml
appConfig:
  auth:
    enableKeycloak: true
    keycloak:
      serverUrl: 'http://localhost:8081'
      realm: '{YOUR_REALM}'
      clientId: 'dashy'
pageInfo:
  title: My Dashboard
sections:
  - name: My Section
    items:
      - title: NextCloud
        url: https://localhost/apps/dashboard
Go into keycloak and create a client named "Dashy" with the following settings:
Now, if you restart Dashy, you should be able to log in through KeyCloak and then enter NextCloud directly, as it automatically checks KeyCloak to see if you have an active session!
Sources